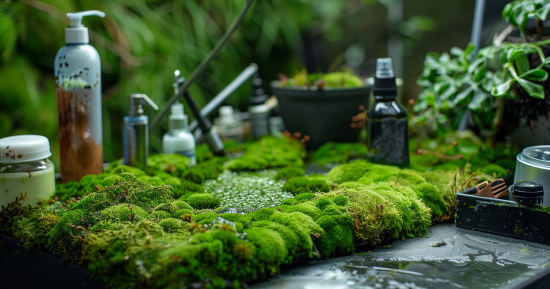
Transforming your home decor with natural elements can be both captivating and effortless. Creating your moss wall art adds a touch of greenery and requires minimal maintenance.
Make Moss Wall Art
Following a few simple steps, you can make a vibrant, preserved moss wall that enhances any space.
To start, you’ll need preserved moss, wood glue, and a frame or panel. This project can be customized to fit different styles and spaces, allowing you to unleash your creativity. Imagine how a lush and green wall will improve the ambiance of your living room or office. Moreover, whether you opt for a bold design or a more subtle touch, learning to make moss wall art offers a worthwhile and enjoyable experience. Dive into this rewarding project and bring the beauty of nature into your home.
Gathering the Essential Materials

Choosing the Right Moss
Selecting the correct type of moss is crucial. Preserved moss is often preferred because it retains its lush appearance without requiring water. You have various types: reindeer, sheet, and cushion moss.
Preserved moss: This is treated to maintain its fresh look over time without ongoing care.
Living moss: Though it requires maintenance, it adds a dynamic and vibrant touch. Consider mixing different moss types to add texture and depth to your artwork.
When purchasing, ensure the moss is free from pests and disease.
Selecting a Frame or Panel
The frame or panel serves as the foundation for your moss art. You can use premade frames, or construct your own using materials like wood, plywood, or plastic. Frames can be of any size, but a sturdy backing is important to support the moss.
Size and Shape: Choose frames that fit your space and design vision. Be creative with shapes, from traditional squares to unique forms.
Assembly: Ensure the frame or panel is well-built to handle the weight of the moss. A strong adhesive is needed to attach the moss securely.
A high-quality frame will ensure the longevity and stability of your moss wall art.
Tools and Supplementary Materials
Several tools and supplementary materials will make the creation process smoother:
- Adhesive: Use a strong, non-toxic glue to attach the moss.
- Scissors or pruning shears: For trimming and shaping the moss.
- Spatula: Helps to press moss into place and remove air pockets.
- Spray bottle: Useful for moistening the moss during application.
Optional tools:
- Protective gloves: To keep your hands clean.
- Apron: To protect your clothing.
- Spackling compound: To patch any imperfections on your wall before starting.
Gather all these materials before you begin to ensure a smooth crafting experience.
Creating Your Moss Wall Art Step-by-Step

Preparing the Base
You can start by selecting a sturdy backing for your moss wall art. Common choices include wooden boards, picture frames, or canvas.
Ensure your base is smooth and clean. If necessary, sand it down to remove any rough spots. Apply a layer of primer or sealant to the base. This provides a better surface for the adhesive and moss to bond. Allow the primer to dry completely before moving on to the next step.
Next, gather all the materials you’ll need: moss (preserved or reindeer moss works well), adhesive (hot glue or craft glue), and any additional decorative elements like branches or lichen.
Organize your workspace for easy access to all your materials.
Arranging and Attaching the Moss
Begin by laying out your moss on the base without any adhesive. This helps you visualize the final look and lets you adjust the design as needed.
Start with larger pieces and fill in gaps with smaller bits of moss. Once satisfied with the layout, secure the moss to the base.
Use a hot glue gun or craft glue, applying a generous amount to ensure each piece sticks firmly. Press each piece for a few seconds to reinforce the bond.
For added texture and depth, consider layering different types of moss and other natural elements. Cut pieces of black lichen or similar materials to create contrast and enhance your design.
Make sure to secure all elements neatly and ensure no loose ends.
Adding Finishing Touches
After attaching the moss, it’s time to add the finishing touches.
Please look over your artwork for any loose pieces and secure them with additional glue. This ensures the longevity and durability of your moss wall art. Add decorative elements like small branches, stones, or fairy lights to give your piece a unique flair.
These can be glued or strategically placed among the moss.
To hang your art, insert a drywall anchor into the wall. Then, secure a screw into the anchor at the appropriate depth. Use a tape flag to mark your stopping point and ensure the screw doesn’t go in too deep. Let the glue dry completely before hanging your artwork on the wall.
Enjoy your vibrant moss wall art and the natural beauty it brings to your space.
FAQ: Make Moos Wall Art
What materials are needed to create DIY moss wall art?
You’ll need a frame, backing (wood, plywood, or plastic), adhesive, and moss. Choosing the right type of moss is crucial, whether it’s preserved or living moss. Specific moss types include Reindeer moss, Sheet moss, and Cushion moss. Additional supplies like super glue, giblets of moss, and drywall anchors may also be necessary.
How do you preserve moss for long-lasting wall art?
Preserving moss involves keeping it out of direct sunlight and in low humidity conditions.
Avoid touching the moss to extend its life.
Under ideal conditions, preserved moss can last for 4-5 years without much maintenance.
Regular misting may be necessary for living moss to keep it healthy and vibrant.
What are some creative moss art ideas for home decor?
Consider using reclaimed materials as bases for your moss art.
Moss balls, letters, and intricate patterns can add unique touches to your décor.
Incorporating other natural elements like driftwood, stones, or small figurines can enhance the aesthetics of your moss wall art.


