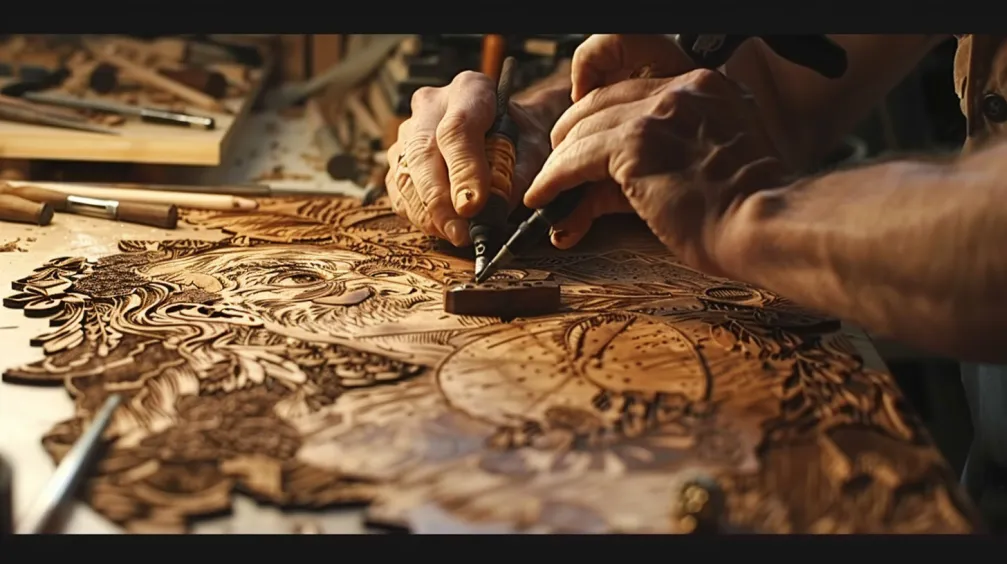
Pyrography, commonly known as wood burning art, is a highly versatile and attractive hobby that allows you to create and etch beautiful patterns and designs onto wood using heat. The wide array of tools and techniques available makes it easy to bring your artistic vision to life, transforming ordinary wooden items into unique, one-of-a-kind works of art.
As you explore the world of wood burning art, you’ll discover endless possibilities for your projects, whether you’re a beginner or an experienced artist. From simple motifs to intricate scenes, easy wood burning ideas will inspire and guide you in your creative journey, helping you hone your skills and master this rewarding craft.
Wood Burning Art
To get started, all you need is a wood burning tool, some wooden materials, and your imagination. You can create a variety of items such as wood burned earrings, Father’s Day cards, and much more. As you gain confidence and expertise, you can experiment with different techniques and styles, pushing the boundaries of your creativity with each new project.
Understanding Wood Burning Art
History and Origins
Pyrography, also known as wood burning art, has a rich history dating back centuries. The art of burning designs onto various surfaces began with the ancient Egyptians and Greeks. Now, wood burning art has become a popular pastime for hobbyists and professionals alike, allowing you to create a wide range of wood burning art ideas that make for unique gifts or decorations.
Materials and Tools
To begin your wood burning art journey, you will need to gather some essential materials and tools. The primary items include:
- Wood: Choose a piece of wood that is smooth and suitable for burning, like basswood or pine.
- Wood burning pen: This tool heats up and lets you etch your designs onto the wood’s surface.
- Tracing paper: Useful for transferring your design onto the wood before burning.
Other tools are helpful when starting wood burning, such as graphite transfer paper, erasers for removing pencil lines from wood, etc.
Now grab your materials and tools, and start exploring the world of wood burning art. With some practice, you’ll soon be able to create stunning jewelry, kitchen supplies, and wall art from the comfort of your home. Don’t be afraid to experiment with different designs and ideas, and most importantly, have fun!
Getting Started with Wood Burning
Choosing the Right Wood

When it comes to wood burning art ideas, the first thing you need to do is choose the right wood to get started. Look for unfinished natural wood slices with smooth surfaces and minimal knots. Common wood types used for pyrography include basswood, pine, beech, and birch. Keep in mind that softer woods tend to be easier to burn on, while hardwoods might require more time and effort.
Basic Techniques and Strokes
Before diving into your wood burning project, familiarize yourself with different techniques and strokes. Start by practicing on a scrap piece of wood to experiment with the varying effects of light and dark shading. Here are some basic techniques you can practice:
- Outlining: create the basic shape of your design using light, consistent strokes.
- Shading: fill in areas of your design with different shades of darkness to create depth.
- Texturing: use different nibs and strokes to create exciting textures and patterns.
Remember that wood burning art requires patience and a steady hand, so don’t expect perfection immediately. Your skills will improve as you practice, allowing you to create more intricate and detailed designs.
Safety Tips
It’s essential to prioritize safety when working with wood burning tools. Here are some ways to ensure a safe and enjoyable experience:
- Wear protective gloves: High-quality heat-resistant gloves can help protect your hands from accidental burns.
- Use a well-ventilated area: Ensure adequate airflow to avoid inhaling potentially harmful fumes from burning wood.
- Use a stand: Place the hot pen on a stand when not in use to prevent accidents, as suggested in this wood burning guide.
Keep these safety tips in mind, and you’ll be on your way to exploring and creating incredible wood burning art ideas. Don’t forget to have fun and let your creativity shine – the sky’s the limit!
Creative Wood Burning Projects

Simple Patterns and Designs
If you’re just starting out in wood burning, you can begin with simple patterns and designs. These can include geometric shapes, leaves, flowers, and other basic images. As a beginner, try creating wooden coasters or spoons with your desired designs. This will not only help you become familiar with your wood burning tool but will also produce an attractive, functional product! Experiment with different shades, outlines, and artistic styles to develop your own unique look.
Portrait Wood Burning
As you become more comfortable with the basics, you might want to try your hand at portrait wood burning. This involves creating detailed and realistic representations of faces or figures on wood. To get started, select a clear, high-contrast reference photo of the person you want to portray. Next, you can use transfer methods to outline the image on your wood piece. Be patient and work in layers to achieve the desired shading and texture. With practice, you’ll be able to create stunning portraits that will impress your friends and family.
Landscape and Scenery
For those who love nature, landscape, and scenery, wood burning projects offer a chance to depict beautiful outdoor scenes on wood. Imagine capturing the tranquility of forests, the majesty of mountains, or the serenity of lakes onto ornaments, frames, or wreaths. When you start, consider focusing on key elements like trees, water, and clouds. As your skills advance, you can incorporate more intricate details and depth into your work.
Finishing and Protecting Your Art
Sanding and Smoothing
After you have completed your wood burning art, it’s essential to take the time to sand and smooth the surface properly. This process will ensure a professional appearance and better prepare the wood for sealing. Begin by gently sanding the surface with a fine-grit sandpaper, such as 220-grit. It’s essential to sand in the direction of the wood grain to avoid any cross-grain scratches. Depending on the type of wood and the intricacy of your piece, you may need to use different sandpaper grits or a sanding sponge to sand tight areas and edges effectively. Remember, take your time with this step, as a smooth surface produces a polished final result.
Sealing and Varnishing
Once the wood has been sanded and is smooth, it’s time to protect your artwork with a sealant or varnish. Two popular options are Spar Urethane and Polycrylic. Spar Urethane provides great UV protection, making it a good choice for heavily used indoor or outdoor items; however, it may turn yellow over time. On the other hand, Polycrylic doesn’t yellow over time and is ideal for heavily used indoor items, but it lacks UV protection.
Once the sealer has been applied, there is no opportunity to add further firing details. Before sealing, the surface of the wood should be flawless and free of pencil marks.
You can follow these steps to seal your wood burning art:
- Choose a well-ventilated area to work in, as some sealants emit strong fumes.
- Put on gloves and shake or stir your sealant before use.
- Pour a small amount of sealant into a container (never dip your brush directly into the product to avoid contamination).
- Apply the sealant evenly using a brush or a lint-free cloth.
- Allow the sealant to dry thoroughly according to the manufacturer’s instructions.
- If necessary, apply additional coats for more protection, allowing the piece to dry between each application.
By following these steps, you’ll ensure that your beautiful wood burning art ideas are well protected and can be enjoyed for years.
Tips and Inspiration

Finding Inspiration
When looking for wood burning art ideas, exploring various sources of inspiration is essential. Explore online galleries to discover different styles and concepts. You may find ideas in nature, architecture, or your favorite patterns. Don’t forget to visit local craft stores and bookshops to pick up books and magazines on pyrography.
Experimenting with Different Styles
Once you’ve found some inspiration, it’s time to experiment with different styles to make your wood burning art unique. Begin with beginner-friendly projects like coasters or personalized cutting boards, and gradually work your way up to more complex designs, such as freehand drawing pine trees or creating wood-burned color block wall art. Remember to practice regularly on scrap pieces of wood to hone your skills and ensure consistent lines and shading.
Joining the Wood Burning Community
Consider joining the wood burning community to boost your creativity and knowledge of wood burning art. This will help you learn from other artists, share your work, and find additional sources of inspiration. Engaging with the community can be done by attending workshops, joining online forums, or following wood burning artists on social media. Being surrounded by like-minded individuals will surely lift your creativity and enthusiasm as you continue to explore new wood burning art ideas.
Remember, practice and patience are crucial to improving your wood burning skills. By exploring new sources of inspiration, experimenting with different styles, and connecting with the wood burning community, you’ll be on your way to creating beautiful and unique pieces that you and others can appreciate.
What do you particularly like about wood burning art? Feel free to share your thoughts in the comments.
What is the difference between wood burning and pyrography?
Wood burning art and pyrography are often used interchangeably; however, pyrography implies a more refined, artistic technique, while wood burning can also refer to more casual or craft-focused work.
How do you transfer a drawing to wood for wood burning?
To transfer a drawing to wood for wood burning, use carbon paper: place it dark side down on the wood, lay your drawing on top, and trace firmly. Alternatively, print the design with a laser printer and iron it onto the wood.
Is Bamboo good for wood burning art?
Bamboo can be used for wood burning art, but it requires caution due to its hardness and tendency to split. It’s fibrous, so it burns differently than softer woods and may give varied results.


