Mosaic art is an impressive and durable way to add artistry and liveliness to your space. This versatile art form involves arranging small pieces, known as tesserae, to create a larger image or design. A variety of materials, such as glass, stones, porcelain, seashells, and other found objects, can be used in creating mosaics. The endless possibilities that mosaic art offers make it an excellent avenue to showcase your creativity while repurposing and transforming materials.
Creating Your Own Mosaic Art:
To make your own mosaic art, you will first need to choose a design or pattern you’d like to create. Sketching your ideas on paper can help with planning and visualizing the final product. Next, gather the materials you will use as tesserae and a sturdy surface to serve as your mosaic base.
The base should be strong enough to support the weight of the tesserae and any adhesive used. Some popular options for bases include table surfaces, picture frames, glass windows, or metal sheets for wall art. With your design and materials ready, you’ll be well on your way to creating a one-of-a-kind piece of mosaic art that you can proudly display in your home or garden.
History and Evolution of Mosaic Art

Ancient Mosaics
The origins of mosaic art can be traced back to Mesopotamia around the 3rd millennium BC. These early mosaics were made from materials such as ivory, seashells, and stones, often depicting abstract patterns, which laid the groundwork for future mosaic creations.
As you explore the ancient world of mosaics further, you’ll discover that this art form also flourished in Egypt and Greece. For example, in Mesopotamia, around 3000 BCE, clay cones were used to create intricate mosaics on temple walls, often depicting religious and mythological scenes.

Mosaic art continued to progress and innovate in Ancient Greece and the Roman Empire. Among the well-known techniques from this period was the use of tiny, colored stone cubes called tesserae. These cubes allowed artists to create incredibly detailed and realistic images. Some of these magnificent works can still be seen today in places like the ruins of Pompeii or stunning Byzantine churches.
Modern Adaptations

As you delve into the more recent history of mosaics, you’ll find that the Art Nouveau movement brought about new forms and technologies to this ancient art. During the late Victorian period to the early 20th century, artists embraced the elegant curved lines of this movement and incorporated them into their mosaic designs.
In today’s world of mosaic art, you will see a myriad of styles, materials, and techniques inspired by the centuries of artistic evolution. Modern adaptations embrace not only the past but also new artistic methods, including the utilization of glass, ceramic, and even unconventional items like recycled materials or technology.
As you embark on your own journey into the world of mosaic art, remember that it’s a constantly evolving medium, blending the wisdom of ancient civilizations with fresh, innovative ideas. So, gather your inspiration, and let the rich history of mosaics guide you as you create your masterpiece.
Materials and Tools for Mosaics
Choosing the Right Tesserae
When creating your mosaic art, the first step is to select the appropriate tesserae, which are the small pieces that make up the mosaic. Tesserae can be made from a variety of materials, such as glass, stones, porcelain, and seashells source. You can purchase pre-made tesserae at most craft stores or use items lying around your house as tesserae. Make sure to consider the size, shape, and color of your chosen materials to achieve the desired effect.
Cutting Tools and Adhesives

Once you have your tesserae, you might need cutting tools to adjust their size and shape. A tile cutter or a pair of tile nippers can be used for cutting ceramic tiles source. Always remember to wear safety goggles and gloves when cutting materials for your mosaic art.
Adhesives are crucial for attaching tesserae to the base of your mosaic. It’s essential to choose an adhesive that is strong and appropriate for the type and weight of the tesserae you are using. Common options include white PVA glue, tile adhesive, and clear silicone adhesive.
Grouting Supplies
Grouting is the process of filling the spaces between the tesserae to provide a finished appearance.
You will need a few supplies for this step:
- Grout: a cement-based powder that you mix with water. Choose a color that complements your tesserae.
- Mixing container: a plastic bowl or container for preparing the grout.
- Mixing tool: a spatula or a spoon to mix the grout until it has a smooth consistency.
- Grout sponge: a tool to apply the grout evenly across the mosaic surface.
By selecting the right materials and using appropriate tools, you can create a stunning mosaic masterpiece that showcases your creativity and skills.
Designing Your Mosaic

Composition and Patterns
When designing your mosaic art, start by considering the composition and patterns. Mosaic patterns can be simple geometric shapes, complex images, or interpretative designs. To decide on a pattern, consider the space where your mosaic will be displayed, whether it’s a wall, floor, or decorative piece. Seek inspiration from existing mosaic designsor use your imagination to come up with your own unique ideas.
It’s important to choose tesserae materials that fit well with your chosen pattern. Pieces of materials used in mosaic art are usually made of glass, stones, porcelain, or seashells, but you can also explore more unconventional items such as buttons, bones, and metals.
Color Schemes and Textures
Selecting a color scheme is a crucial aspect of designing your mosaic art. Pick colors that complement your pattern and create a harmonious overall appearance. You can use contrasting colors for a striking effect or opt for shades within the same color family for a more cohesive look. When selecting your tesserae, focus also on their texture. Various texts can add depth and interest to your mosaic, like smooth glass, rough stones, or intricate seashells. This combination of colors and textures will make your mosaic artwork more visually appealing.
Sketching and Planning
Before you start assembling your mosaic, take time to sketch out your design on a piece of paper to visualize your idea. This initial sketch helps with the planning process, and you can make any necessary adjustments before transferring it onto your mosaic base.
Here’s a brief checklist to guide you in the sketching and planning process:
- Finalize your pattern and composition
- Choose your color scheme
- Determine the size and shape of your mosaic base
- Select the appropriate tesserae materials and textures
- Plan the arrangement of tesserae for a balanced look
With careful planning and an eye for detail, you’ll create a beautiful mosaic art piece that reflects your creativity and vision.
Mosaic Creation Process
Laying the Tesserae
To begin your mosaic art project, first choose the material you’ll use for your tesserae these are the small pieces that make up the mosaic. Tesserae can be made from a variety of materials such as glass, stones, porcelain, seashells, or anything else you can find. Next, sketch out your design on paper, and then transfer it to the surface you’ve chosen as the base for your mosaic. This should be a strong and rigid surface that can handle the weight of the tesserae and adhesive . Once your design is on the base, you can start arranging your tesserae following your desired pattern.
Applying Adhesive
With your tesserae in place, the next step is to apply adhesive. Various adhesives are available, but some common options include PVA glue or a premixed tile adhesive. Apply the adhesive to the back of each tesserae piece, ensuring that the entire surface is covered, and then press it firmly onto your mosaic base. Allow the adhesive to dry according to the manufacturer’s instructions before moving on to the next step.
Grouting and Finishing

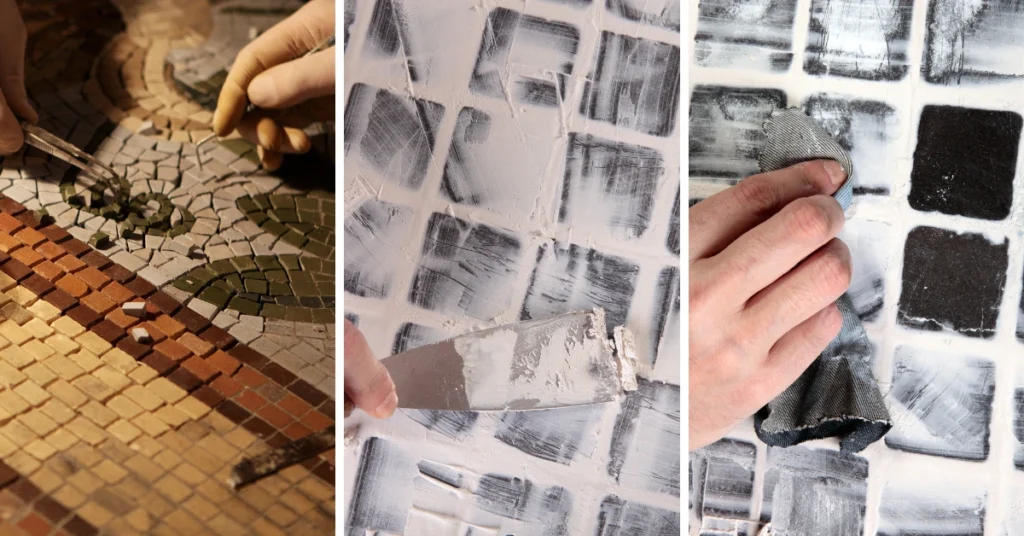
Once the adhesive is dry, you’re ready to apply grout to your mosaic. Grout is a thick paste that, when applied, fills the gaps between the tesserae and holds them together.
To apply the grout, follow these simple steps:
- Mix the grout according to the package directions, making sure it has a smooth and thick consistency.
- Spread the grout over the mosaic, ensuring that it covers all the tesserae and fills the gaps between them.
- Remove excess grout with a spatula or scraper, leaving a clean surface where the tesserae are visible.
- Allow the grout to dry according to the package directions.
After the grout is dry, you may wish to polish your finished mosaic art piece with a clean, damp cloth to remove any residue or haze. Your mosaic creation is now complete, so proudly display your masterpiece for all to admire!
Displaying and Caring for Mosaic Art

Installation Tips
Installing your mosaic art is an important step to showcase your creation. Choose a suitable location that complements the colors and style of your artwork. When installing on walls, make sure the surface is clean and free of debris. If your mosaic is heavy, like those made from stones or glass, consider adding support brackets for added stability. For outdoor installations, ensure the area is properly prepared and the materials you’ve used are suitable for outdoor conditions.
Maintenance and Repair
Caring for your mosaic art is essential to keep it looking beautiful for years to come. Regularly dust your piece with a soft cloth to remove dirt and debris. For more thorough cleaning, use a mild soap and water mixture, avoiding harsh chemicals that could damage the materials.
Ensure your mosaic art is displayed in an area with minimal exposure to direct sunlight to prevent fading. If your mosaic is outdoors, consider sealing it with a weather-resistant sealer to protect it from the elements.
In case of damage, it’s important to have a repair plan in place. Keep some extra tesserae (the small pieces used in your mosaic) for any necessary repairs. When repairing, carefully remove the damaged pieces and clean the area before applying new adhesive and fitting in the replacement tesserae.
By following these installation and maintenance tips, you can enjoy your beautiful mosaic art for many years to come, and share your unique creation with friends and family.
Have you already made mosaics or have you seen a particularly beautiful mosaic piece? Feel free to share your impressions in the comments.
What are the 3 main types of mosaic?
The three main types of mosaic are vitreous (glass tiles), ceramic (clay tiles), and stone (natural stone tiles).
What tiles are best for mosaic?
Vitreous glass tiles are best for mosaic due to their durability, color variety, and ease of cutting. They are suitable for indoor and outdoor use.
What are the three methods of mosaic?
The three mosaic methods are the direct method, the indirect method, and the double indirect method, each catering to different design complexities and installation scenarios.
What is the direct mosaic method?
The direct mosaic method involves adhering tiles directly onto the final surface, suitable for small projects or surfaces that can’t be moved.
What is the indirect mosaic method?
The indirect mosaic method involves placing tiles face-down onto a backing paper, then transferring them to the installation site, allowing for large-scale work and flat surfaces.
What is the double indirect mosaic method?
The double indirect mosaic method involves assembling tiles on an adhesive surface, then transferring them to a temporary substrate. Afterward, the mosaic is moved to its final location. This allows for complex designs and is useful when the mosaic cannot be directly installed in its intended place.


